2.2 Pixel Art in Excel
This is a super fun way to introduce Microsoft Excel to students. This great lesson lets students learn the basics of Microsoft Excel as
they create pixel art using the program. First, they’ll create a quick pixel art from a given example and then they’ll create their own! I hope your students have as much fun as mine did learning Excel! Just follow down the stream below.
Watch this short fun documentary about some of the back-story to pixel art.
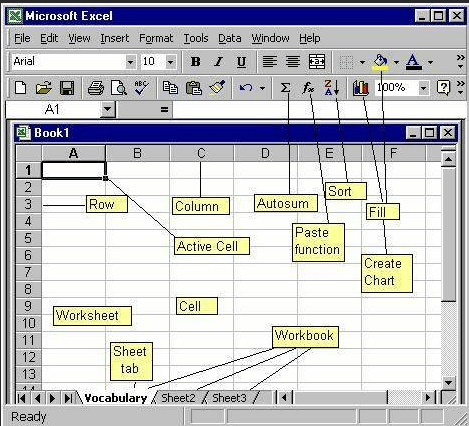
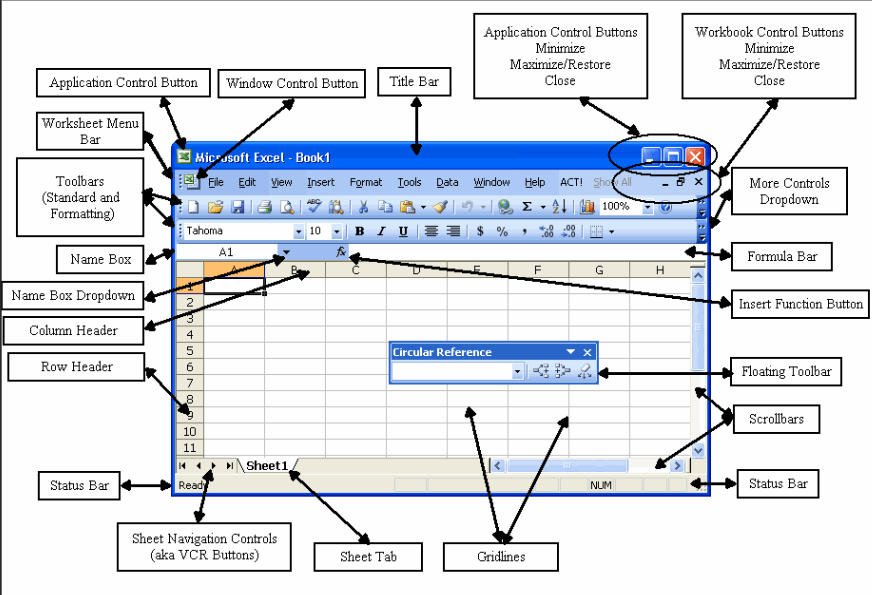
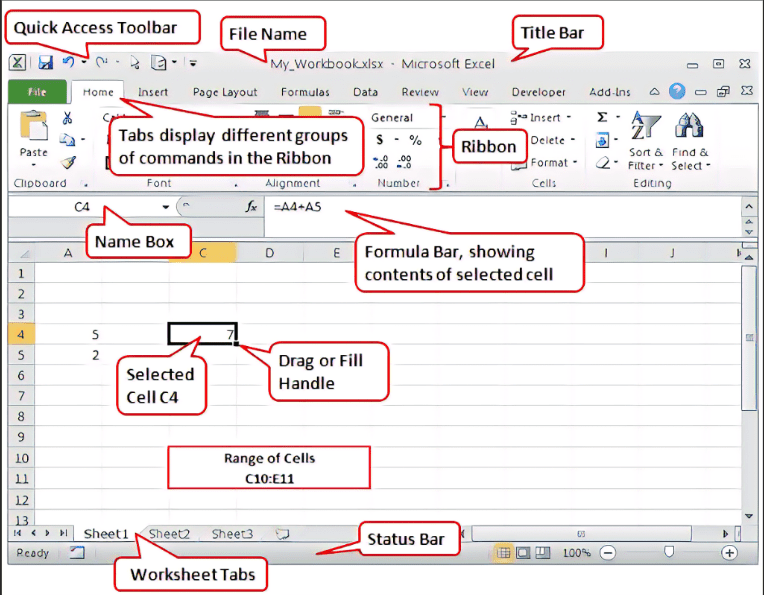
Here are a few diagrams showing the different parts of Microsoft Excel. Be sure you know each of these vocabulary words. We’ll have some Blooket Games at the end!
How to Create Art with MS Excel?
Step 1: SELECT the entire spreadsheet, right click and set the ROW HEIGHT as 10 pixels. Now right click any of the column headers and set the COLUMN WIDTH as 2 pixels.
Step 2: Set the ZOOM LEVEL of the spreadsheet to around 60%.
Step 3: Go to PAGE LAYOUT -> BACKGROUND and set the background image as the Google Logo. We’ll use it as a tracing image.
Step 4: Now click any of the cells that lie above the “G” symbol and set the FILL COLOR using the FORMAT PAINTER (paint bucket icon) same as the color of “G”. Copy that cell and paste it all over G. You may change the fill color to lighter shades around the edges to slightly reduce the staircase like pixel effect.
Step 5: Follow the same with other symbols but remember to replace the fill colors accordingly. Once done, delete the background image.
Now to Create Your First MASTERPIECE!
Simon says, do what this guy does… um, or something even better… But this will get your creative engines turning.
And now for Flappy Bird!
Because who doesn’t want to create a pixel art of Flappy Bird?
Try playing these Blooket sets now that you’ve used Excel a little bit.
Learn By Doing – MOS Excel 2016_Lesson 1 | Blooket
Final Project
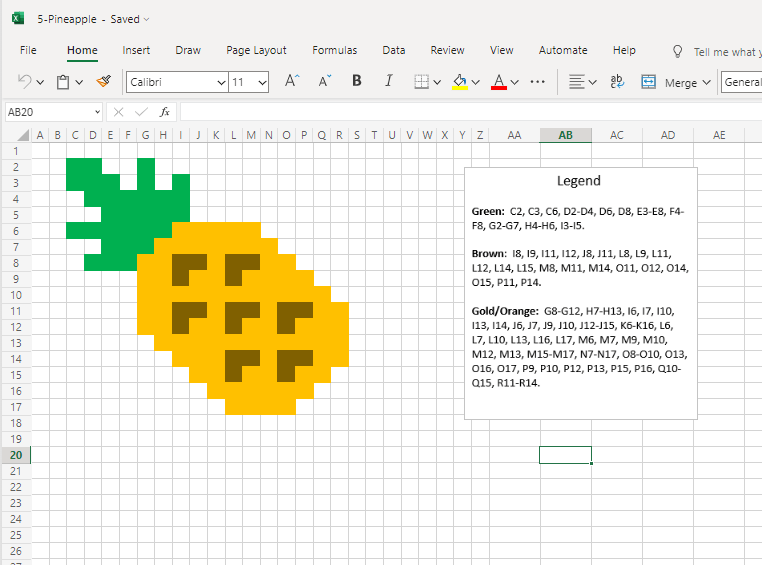
Now, go to the materials tab at the top and pick out a project to try on your own. Here’s a picture of the Pineapple project. Each of the projects has a picture and a Legend to give you some idea of where to put what colors. Go ahead and give it a try!
We hope you enjoyed learning about Pixel Art and Microsoft Office!